Get out your yoga mat now and learn the blend of both physical and mental activities that has captivated yoga practitioners all over the world for thousands of years. It’s wonderful about yoga that anyone can do this and take benefits from it. Yoga poses has the ability to quiet the mind and empower the body, regardless of age, weight, or physical fitness.
Yoga for beginners at home is simple with different easy yoga poses. The practice of yoga has been practiced for thousands of years and has grown in popularity in the West. It uses a series of physical exercises, breathing techniques, and meditation techniques to calm the mind and strengthen the body. Don’t let yoga terminology, posh yoga studios, or challenging positions scare you. Anybody could do yoga.
For novices, yoga poses has advantages including enhanced flexibility and strength as well as stress reduction.
For people of various ages and physical capacities, yoga is an excellent type of exercise.
Child’s posture, easy sitting, tree pose and downwards dog are examples of beginner yoga poses.
The full yoga routine consists of different poses; out of them are these 10 poses. Remember to breathe as you progress slowly through each pose. If you find a posture difficult, pause after it, particularly if you are out of breath, and resume the pose once your breathing has returned to normal.
1. Child’s Pose
This serene stance makes an excellent initial pause. Before moving on to your first posture, you might take a moment to relax and refocus in child’s pose. It stretches your lower back gently. It relaxes the neurological system and extends the back, thigh, hip, ankles and arm muscles.
- Kneel on the ground with your toes pointed and close together, and your knees broader than your hips.
- On the ground in front of you, extend your arms shoulder-width apart. Place your forehead down on the ground.
Perform it: When you want a pleasant, gentle stretching through your neck, spine and hips.
Do Not Perform: If you have issues with your ankles or knees. Avert if you are pregnant or have hypertension.
Tip to Ease: insert a wrapped towel or cushion in between the bottom of the thighs and your calves if either knees or hip joints are feeling tight. Another option is to place a yoga block or pillow under your forehead.
2. Tree Pose
It not only strengthens your back, ankles, calves, thighs, and spine, but it also helps you balance. Additionally, it stretches the hip-supporting muscles.
- Position your feet hip width apart while you stand.
- Elevate your left leg and then slightly stretch your left knee.
- Place your right foot under weight.
- Never put your left foot on your knee; instead, place it on the inner side of your right leg or above it.
Perform it: Excellent for enhancing your posture and balance.
Do Not Perform: If you’re suffering from low blood pressure or other medical conditions that impair your balance, you may omit this position.
Tip to Ease: To provide support you can put one of your hands on a wall.
3. Downward Facing Dog
Downward facing dog extends your hamstrings, calves, and foot arches while strengthening your arms, shoulders, and back. Back pain could also be reduced by it. Additionally, it tones the muscles in the shoulders, wrists, legs, and abdomen.
- Put your hands on the floor just below your shoulders.
- Underneath your hips, put your both knees on the ground.
- Lift your hips up toward the ceiling while tucking your toes.
Perform it: To assist in easing back pain.
Do Not Perform: If you have hypertension, carpal tunnel syndrome, other wrist issues or in the final weeks of pregnancy, skip this pose.
Tip to Ease: To lessen the stretch, knees should be bent or spread your feet when pedaling. You might also rest your hands against a wall or chair.
4. Bridge Pose
The thighs, buttocks, back and arm muscles are strengthened by the bridge posture. According to Sarah Court, DPT, a physiotherapist and well known yoga instructor who teaches at various sites throughout Los Angeles, it also extends the back, shoulders, and hip, loosening up the muscles that are tightened by bending down over a computer all day.
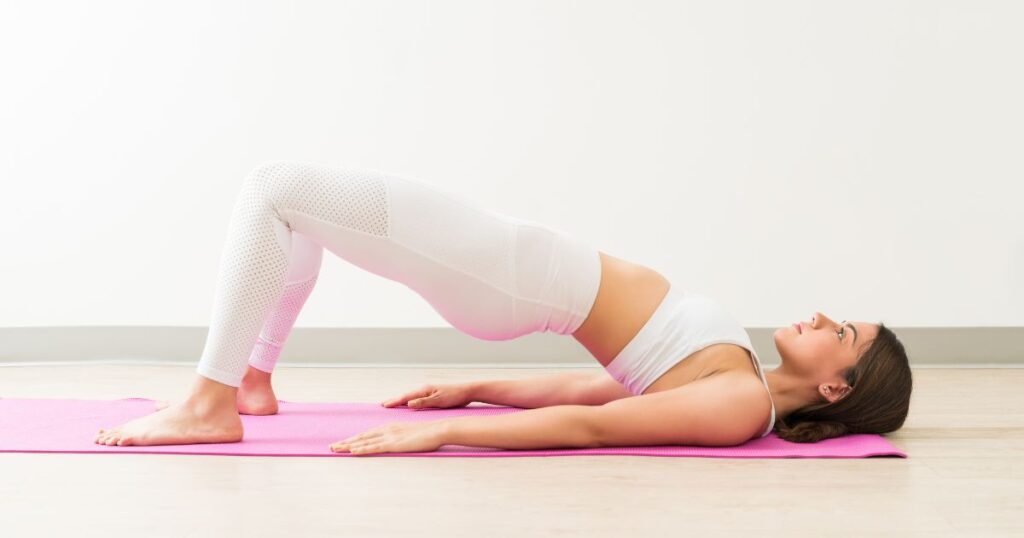
- Put your feet level on the ground about 2 feet from your hips while lying down on your back with your arms at the sides and bent your knees.
- Keep your knees at hip-distance apart while raising your buttocks off the ground.
Perform it: This pose will aid in opening your upper chest if you spend most of the day sitting down.
Do Not Perform: If you’ve suffered a neck injury, stay away from this pose.
Tip to Ease: To assist in maintaining the appropriate alignment of the legs and feet, place a folded blanket between your thighs. If your lower spine hurts, you can also use a block below your pelvis.
5. Plank Pose
Plank Pose teaches us to discover psychological and physical ease in a difficult posture, making it as much a mind-strengthening posture as it is a core-strengthening one. An encouragement that we can overcome challenges both on and away from the mat.
- As if you were ready to perform a push-up, place your hands directly beneath your shoulders, a little wider than your shoulders.
- To balance your body, plant your toes firmly on the ground and tighten your glutes. Aim to keep your legs moving; take care not to lock or overextend your knees.
- By focusing on a location on the floor approximately a foot behind your hands, you can neutralize your neck and spine. Your back and neck should be in alignment.
- For 20 seconds, maintain the position. Hold your posture for as long as you can without endangering your form or breathing as you become more accustomed to the exercise.
Perform it: If you want to strengthen your upper body and tone your abs, the plank stance is a wonderful choice.
Do Not Perform: If you have carpal tunnel syndrome, avoid plank stance. It could be difficult on your wrists. If you have backache, you might also avoid it or amend it.
Tip to Ease: Keep your eyes softly fixed on the floor directly in front of you for five breaths, or as long as you’re able to.
6. Triangle Pose
Triangle is a fantastic standing pose for opening up the lungs, strengthening the legs, and toning the full body. Triangle Pose is a fundamental standup pose in many yoga traditions. The neck and hips can both become more mobile with its assistance.
- Place your feet apart as you stand. Keep your right leg closer to your body and extend your right foot 90 degrees. Keep your feet firmly planted on the ground and distribute your weight evenly between both feet.
- Inhale, and as you exhale, extend your left arm towards to the roof while resting your right hand outside of your right foot on the shin, ankle or the floor.
- Observe the top hand with your gaze as you hold this position for 5-8 breaths. To get up, inhale, then repeat on the other side.
Perform it: This position is excellent for increasing stamina and strength.
Do Not Perform: If you have a migraine or low heart rate, stay away from this stance.
Tip to Ease: If you feel wobbly in the stance, lean against a wall with your back heel or your body.
7. Cobra Pose
This backbend pose stretches your chest, abdomen and shoulders and can also strengthen the back muscles and improving whole body flexibility. Although a full cobra with overhand grip promotes a deeper backbend, executing low cobras, during which you uplift your chest while pressing into your hands, will help you develop more back strength.
- Start on your stomach with your hands by your ribs and your feet hip-distance apart.
- To engage your quadriceps, straighten your big toes and push down including all ten toenails.
- To widen the lower back, twist your inner thighs upward.
- Lifting your chest and your head while gently pressing your hands down will cause your shoulders to roll back and down.
- Maintain a long back of the neck and concentrate on elevating your sternum rather than your chin.
Perform it: Cobra Pose increases stamina and overcomes fatigue. It corrects posture and mitigates the negative consequences of extended computer use and sitting.
Do Not Perform: If you have carpal tunnel syndrome, neck or spine rheumatism, a low back injury, or any of these conditions.
Tip to Ease: Just stretch your arms into the Cobra Pose until you can feel your back’s sensations distributed evenly.
8. Cobbler’s Pose
The Cobbler’s Pose stretches the groin area and hips. In this position, infants and toddlers frequently sit on the floor. Adults frequently lose the practice and instead like spending more time seated in seats with their legs crossed. Back pain and other postural issues may ensue.
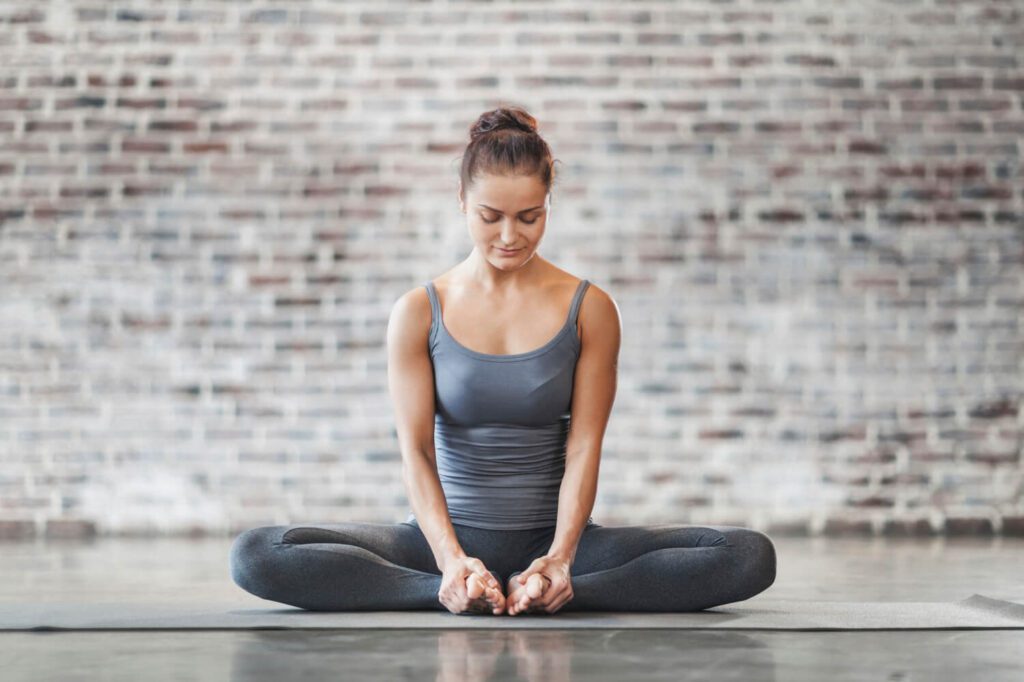
- Allowing your knees to fall to either side, bend your legs and bring your feet’s soles together. To engage your quadriceps, straighten your big toes and push down including all ten toenails.
- As closely as is comfortable, bring your feet in toward your torso. If your knees start to hurt, take a step back. Lifting your chest and your head while gently pressing your hands down will cause your shoulders to roll back and down.
- Put a lot of pressure on your feet’s outside edges. The feet might start to spread out like a book. You can do this by guiding it with both hands or by locking your big toes together.
- Maintain your shoulders shifting away from your ears, sit upright with a long spine, and keep your neck and shoulders on your back.
Perform it: In order to start reversing the consequences of excessive time spent sitting at a computer or in a car, stretch the hips and groin area.
Do Not Perform: If you have a knee or back injury and feel any pain while doing this pose, don’t attempt it.
Tip to Ease: If your spine tends to round forward as you sit firmly on the floor, put cushions under your sit bones.
9. Low Lunge Pose
You can adapt the well-known lunge exercise to expand your psoas tissues and other hip flexors. You can loosen up and combat the affects of prolonged sitting or tight buttocks from sports like cycling by performing this simple stretch.
- As you exhale, move your right foot through between your hands while staying in downward facing dog position.
- The top of your left foot should be on the ground as you bring your left knee towards the floor.
- Take a long deep breath in, raise your body, and extend your arms overhead and out to the sides.
- For 30 to 60 seconds, hold the position of the low lunge.
- Take a deep breath out, put your hands down on the ground, raise your left leg, take a step back, and then resume the downward dog position.
Perform it: Exhale deeply, place your hands on the floor, lift your left leg, step back and afterwards return to the downward facing dog position.
Do Not Perform: A decent stretch should be felt, but if you experience any pain, slowly come out of this posture.
Tip to Ease: You can extend farther by taking deeper breaths. Inhale while you rest and release as you initially conduct the work.
10. Corpse Pose
Normally yoga poses end in this posture. Although it offers for a brief period of relaxation, some individuals find it challenging to maintain this stance. But the more times you practice this stance, the simpler it is to enter a peaceful, relaxing state.
- Lean back and lie down. Split your legs apart. Bring your arms parallel to, but slightly away from, your body. Your palms now need to be pointing upward.
- Allow yourself to breathe normally. You can focus on your breathing when your thoughts start to stray, but make sure to only observe it rather than deepen it.
- Spend at least five minutes here. Excellent is 10 minutes.
Perform it: Throughout the five to ten minutes of final relaxation, you should make an effort to remain alert and in the moment.
Do Not Perform: If you don’t want to enjoy a moment of tranquilly.
Tip to Ease: Put a folded blanket under your thighs to intensify the sensation of being routed to the soil. An eye pillow and a block placed right below your navel have a comparable impact.
Important: Yoga is safe for anyone of any age and physical abilities, however if you’re over 55, pregnant women or suffer from a pre-existing medical condition, consult a doctor before practicing.
Q & A
Can a beginner perform yoga daily?
Yes, you can do. You are free to practice as frequently as you like. Yoga can be practiced daily or perhaps twice a day if you need a strong body-mind connection.
How lengthy should a newbie practice yoga for?
We advise beginning with three to four weekly sessions that last an hour or half an hour. If you’re able to only devote 20 minutes every session, that’s okay. Don’t let deadlines or unrealistic demands hinder the achievement of your success. Don’t worry about the little things; simply perform what you can do easily.
Can we participate in yoga while being on periods?
This is a common question among women. Yes, yoga can be beneficial during your period, especially if you have difficulties in sleeping.
Drinking water before yoga is good or bad?
Staying hydrated during your yoga session requires drinking water few hours earlier. This enables your body to hydrate itself adequately before you start practicing.
What time of day is ideal for practicing yoga?
Yoga is widely performed in the early morning or late in evening time. Yoga sessions in the morning can be very intense and involve a whole session. Whatever the time of day or season, always end your yoga with Relaxed position (Corpse Pose). You can perform in a differen pose or position in the afternoon.
Advantages of physical activites and exercise
I do trust all the ideas youve presented in your post They are really convincing and will definitely work Nonetheless the posts are too short for newbies May just you please lengthen them a bit from next time Thank you for the post
This website is phenomenal. The splendid content reveals the site owner’s passion. I’m awestruck and expect more such extraordinary posts.
I just could not depart your web site prior to suggesting that I really loved the usual info an individual supply in your visitors Is gonna be back regularly to check up on new posts
I do trust all the ideas youve presented in your post They are really convincing and will definitely work Nonetheless the posts are too short for newbies May just you please lengthen them a bit from next time Thank you for the post